"I'm looking to stream and record a live video Webinar or a GoToMeeting session. How do I record it and convert a GoToMeeting recording into a format that I can upload to YouTube?"
GoToMeeting is widely used for video conferencing and collaboration. It becomes a need to save GoToMeeting session or video webinar. Well, if you have a vague impression on GoToMeeting, or you are just a new GoToMeeting user, you can check this article and explore how to record GoToMeeting session on your computer.

As the useful team collaboration tool, GoToMeeting has also been equipped with the recording function. It is convenient to record the online meeting while hosting or joining a video, audio or web meeting.
GoToMeeting offers two recording modes, including cloud recording and local recording. You can follow the steps to record online GoToMeeting sessions.
Before using Cloud Recording, you need to enable it in Admin Center.
Step 1. Navigate to Account Administrators, and log in GoToMeeting account.
Step 2. Click User Settings > GoToMeeting > 2) Change Settings > Features > Record Settings.
Step 3. Choose and enable Cloud recording. Then, click Save to save the setting.

Step 1. Start your online GoToMeeting with the desktop version on Windows or Mac. You can also use the online GoToMeeting recording.
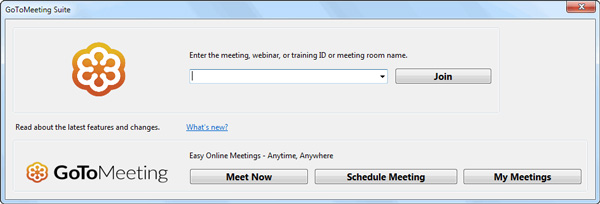
Step 2. Click Meet Now to start a new GoToMeeting. You can choose the audio, screen, and webcam recording settings. For more settings, you can click the gear icon.
If you are a GoToMeeting attendee, you can enter the meeting ID to join the GoToMeeting room.
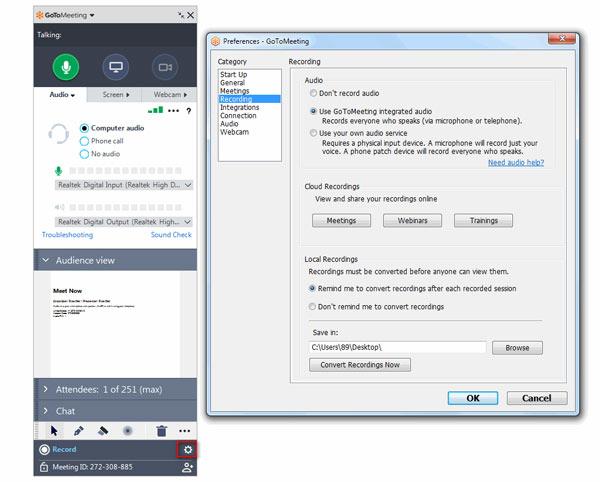
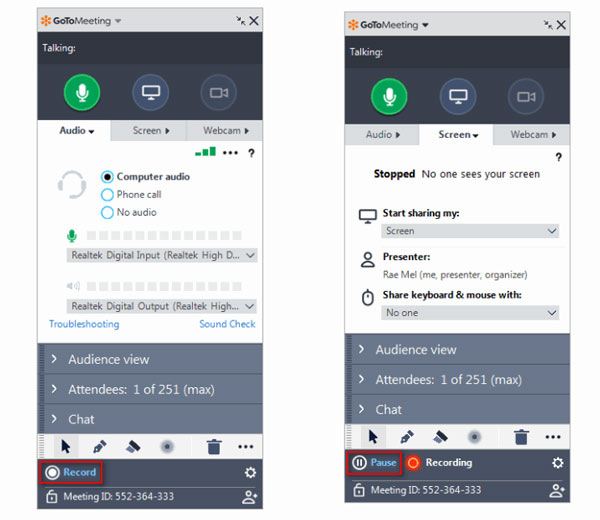
Step 3. Click Record button next to the gear icon, and the recording will be started. If you want to stop recording, just click Pause button.
Step 4. Click Meetings in Cloud Recordings setting to view and download the GoToMeeting recording.

Note: After recording, your GoToMeeting session recording will be automatically saved to the cloud. You can view, delete, or download the recording to your local computer.
You can use Admin Center to enable local recording. The recording will be saved in the local folder automatically. Follow the steps to start local recording.
Step 1. Open GoToMeeting app, and click Meet Now to start a new GoToMeeting.
Step 2. Click the gear icon to set local recording settings. You can click Browse to choose the local folder where the recording will be saved. Then, click OK button.
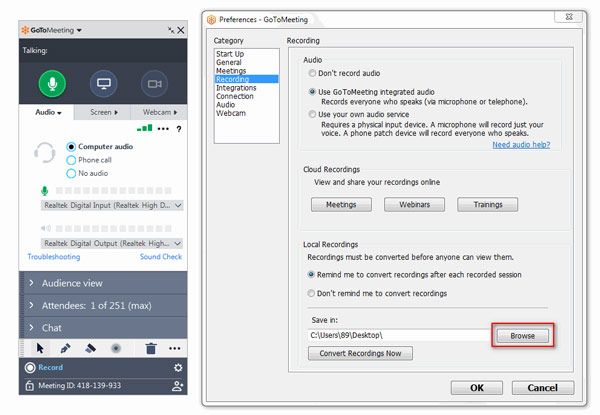
Step 3. Click Record to start recording GoToMeeting session. Click Pause to stop the recording.
Generally, the GoToMeeting recording file is stored as G2M file in the local folder. You need to convert it to common video files like MP4.
An efficient way to record GoToMeeting session is to use a third-party program. Though there is a lot of online meeting recording software, some of them really does a good job in recording. AnyMP4 Screen Recorder should be the best tool for screen capture and video or audio recording.
Key features:
Secure Download
Secure Download
Step 1. Run AnyMP4 Screen Recorder after downloading. Select "Video Recorder" to record GoToMeeting.

Step 2. Select the area you want to record. You can choose to record full screen or customize the screen area.

Step 3. You can select to keep the System Sound or Microphone on. Besides, you have multiple options to select the settings. Click the gear icon to set the recording.

Step 4. Then click the red REC button to start GoToMeeting recording. After the session ends, click Stop button to stop recording. You can preview the recording before saving.
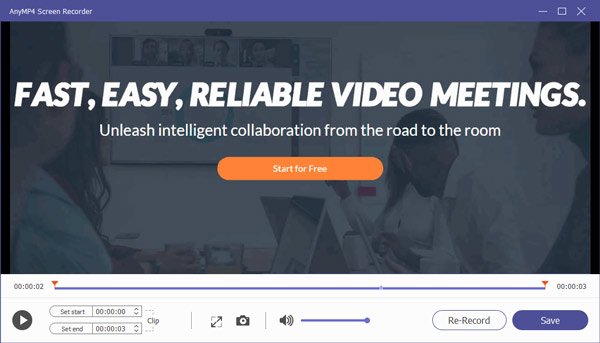
With this software, you can record online meetings as a guest without others knowing for Teams, WebEx, Skype, and more.
We mainly introduced 3 ways to record online GoToMeeting sessions. You can use the built-in recording functions in GoToMeeting. However, a more efficient way is to use this third-party software - AnyMP4 Screen Recorder. It allows you to record any online meetings, GoToMeeting sessions, online videos, and more. So, please don't hesitate to try this awesome product. Or if you have other better recording software, just leave a comment.