We all know that Adobe Photoshop is an advanced image editor, it has become the de facto industry standard in raster graphics editing since it was created. However, little people know that it can also work as a useful video editor. In fact, all the traditional video editing tools are available in Photoshop.

The naming scheme of Photoshop was initially based on its version numbers. However, when the Creative Suite branding was introduced to the market in 2002, the new version of Photoshop was designated with "CS" plus a number, such as Photoshop CS6. In 2013, with the introduction of Creative Cloud branding, the license scheme of Adobe Photoshop was changed to software as a service rental model, and the name scheme was changed from "CS" to "CC". Now the latest version of Photoshop CS series is Photoshop CS6, which was released in 2012, and the latest version of CC series is Photoshop CC 2018, which was released in October, 2017.
Download and run Photoshop and head to the Window menu. Select Timeline which will bring you to the video toolbar. Or you can also head to Window>Workspace>Motion to bring up the whole suite of video controls.
You can import video clips to Photoshop either by dragging a supported video file to the main window or clicking the filmstrip icon in the timeline and select "Add Media."

Now you can start editing video in the Timeline. Please note that the Timeline is the base for all of your video editing, you will cut and arrange your video clips here. It's also necessary to turn the video layer into a Smart Object before you start video editing, which will allow you to apply filters to the entire video image in one particular layer - even if there are cuts or transitions. Choose the correct layer name and select Layer > Smart Objects > Convert to Smart Object. In this way, any adjustments made through filters will be reflected in all frames on that particular layer.
If you are familiar with photo editing with Photoshop, it must be easy for you to edit videos with Photoshop video editor, cause most of the principles are the same.
1. You can apply a lens-correction filter to your video clips if you shoot the video with a camera. Photoshop can automatically detect what camera the video was filmed with. Head to Filter > Lens Correction, and Photoshop should auto-detect the camera.
2. Split video
You can split a video in two with the scissor tool on the Timeline. What's more, Photoshop video editor allows you to move clips back and forth to other layers on the Timeline.
3. Add extra audio and adjust audio quality
With the dedicated Audio Track layer, you are able to add any extra audio files to your video clips. You just need to click the musical-note icon to import music or other sounds. If you want to adjust the audio in your recorded video, right-click on the appropriate clip, then select the musical-note icon to adjust the volume or mute it.
4. Enhance video effects with basic filters
You can access to basic filter via the Adjustments layer palette in the workspace. You can also adjust the exposure, brightness and contrast of your video.
5. Use transitions to your video
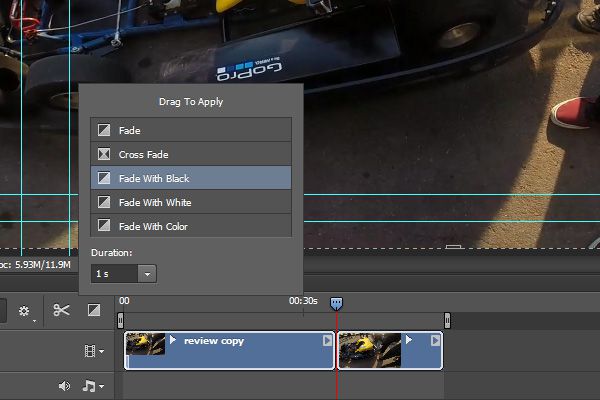
There are common transitions built in Adobe Photoshop, like fades and crossfades. You can find them in the Timeline toolbar. Drag the transition to the appropriate layer on the Timeline to apply it to your video clip. You can also extend or shorten the transition by dragging the duration slider underneath the video image on the Timeline. Alternatively you can control the duration in a more precise way by right-clicking on the transition. More over, you can also apply transitions to your audio.

6. Add texts to video
Photoshop enables you to add text to a video in the same way as still images. But firstly you need to create a new video group in order to adjust the position of the text and placement over the clip. Select the filmstrip icon in the timeline and select "New Video Group", then select the text tool from the side toolbar, place the cursor on the image and now you can start typing. Photoshop will place the text to a new layer so that you can move it to any desired place in the timeline. Please note that you can also use a transition on a text, just with the same method mentioned above for video image.
When you finished editing your video, head to File > Export > render Video. Here you can make adjustments to the output file type, or select one of many Adobe presets to make a short film. Make sure that you have selected "Adobe Media Encoder" rather than "Photoshop Image Sequence", otherwise you will get a series of still JPEG images but not a video.
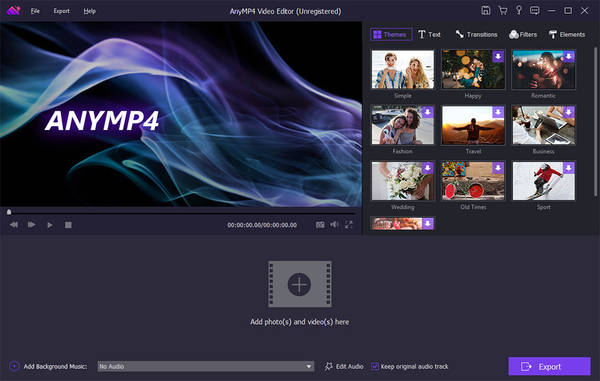
After learning the features and usage of Adobe Photoshop as a video editor, it's obvious that it has two fatal disadvantages, one is that its cost is high, the other one is it only has basic video editing features but it's difficult to use especially for beginners. So what can be a good alternative to Photoshop video editor? AnyMP4 Video Editor must be the top one.
Secure Download

If you haven't tried Photoshop as a video editor before, try now with the instructions above. If you found it's hard to use or the editing effects are not enough, I think AnyMP4 Video Editor will not disappoint you.