While the daily usage of your Dell laptop, you may often need to capture a screenshot. The question is, how to screenshot on Dell?
You can easily take screenshots to save, store or share various contents that showing on your laptop or desktop. Most computers and keyboards are designed with a print screen key, PrtScn to quickly capture screen. However, many users don't know how to get the captured screenshot image.

This post will tell you how to screenshot on Dell with print screen way in detail. Moreover, we like to share 2 more easy methods to help you quickly capture what's displaying on your computer screen.
As it mentioned above, Dell laptop or desktop is equipped with a print screen key to quickly capture a screenshot. But this key does not give you a direct way save the captured screen as an image file. You need to use a picture editing or viewing tool to export it. This part will show you how to use the print screen key to screenshot on Dell.
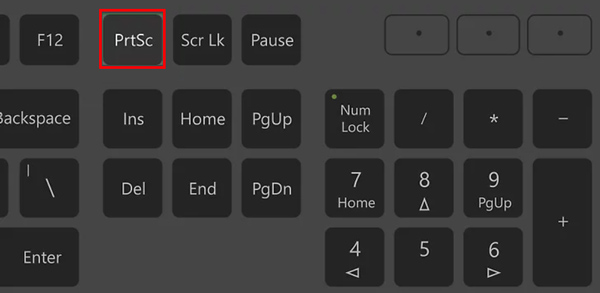
Step 1. First, you need to locate and press the print screen key on your Dell computer. PrtScn key is located next to F12 key on most Dell laptops. It may be written in different ways, like PrtSc and Prt Scr and other variations.

You can easily capture the entire current screen of Dell after you press the PrtScn key. If you want to screenshot on an active window, you should press the print screen way while pressing the Alt key.
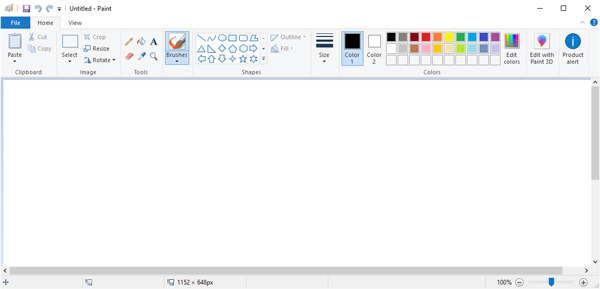
Step 2. There won't be any prompt message or window appears. That way you don't know where to get the screenshot picture. In fact, when you press the PrtScn key, the screenshot will be copied to the system clipboard. You need to paste it to a picture tool like Paint or Adobe Photoshop to access it.

When you open Paint or Photoshop, you can simply press Ctrl + V keys to paste the captured screenshot to it. After that, you can use the common save feature to export screenshot to the local hard drive.
Follow this method, and you can easily take screenshots for other brands of computer like Toshiba, Lenovo, and more
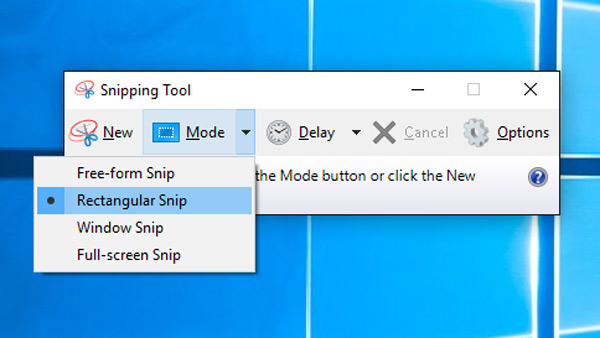
When you want to capture a screenshot on Dell laptop with Windows 10, Windows 8 or Windows 7, you can use the default screen capture utility called Sniping Tool. It provides Windows users a simple way to capture computer screen with entire screen or selected area.
Step 1. When you want to capture screen on a Dell laptop, you can find and open the Sniping Tool app through Windows Search feature.
Step 2. Click the New button to prepare screenshot on Dell. As soon as you click it, you can use your mouse to capture anywhere of the current screen.

Here you can also click the Mode option to select a suitable screenshot way you like.
Step 3. You will be guided to a new screenshot editing window. Here you can use the Pen feature to draw on the captured image. After that, just click the Save button to save the screenshot on your Dell in JPG, PNG, GIF or HTML format.
Snipping Tool is a free program to take screenshots on Windows computer, and you can conveniently take snapshots of HP, ASUS, Dell, etc.
Besides the first 2 kind of default screenshot ways, you can also rely on third-party screen capture tool to screenshot on your Dell computer. Here we strongly recommend the all-featured video recorder and screen capture tool, Screen Recorder for you. It is specially designed to record video and audio played on Windows or Mac computer. In addition, it has a totally free screen capture feature to take a snapshot on your Dell laptop.
Secure Download
Secure Download
Step 1. Double click on the Windows download button above and the follow the instructions to install the Screen Recorder on your Dell laptop or desktop. Run it and select the

Step 2. Your mouse will be the shape of a cross after you choose this feature. Now you can freely capture any region of your Dell laptop screen by dragging the mouse.

Step 3. After capturing, you can see a little bar which carries many editing functions for you to edit the captured image or draw on it. Moreover, you are allowed to adjust the output effect of this screenshot.

Step 4. Click the Save button to save your captured screenshot on Dell. You can save it in any popular image format like JPG, PNG, BMP, GIF, or TIFF based on your need. As we mentioned above, this Screen Recorder also has the screen and audio recording feature. You can free download it and have a try.
Question 1. How to take a screenshot on a HP laptop?
To screenshot on a HP laptop, you can rely on the same 3 methods above to capture any part your HP screen. Similar to Dell, HP is another popular computer brand which runs the Windows system.
Question 2. How to screenshot on Mac?
If you are using a Mac and want to quickly capture the Mac screen, you can press Command + Shift + 3 keys at the same time to do that. To capture a portion of the Mac screen, you can press and hold Shift, Command and 4 keys together.
Question 3. How to take a screenshot of a whole web page in Windows?
In many cases, you want to capture the entire web page. You can't directly do it if you are using Chrome or Safari. You have to get a third-party screen capture tool to screenshot a whole web page. But in Firefox browser, you can use its full screenshot feature to capture the whole page with ease.
Question 4. How do you take a screenshot on a Dell laptop without Print Screen button?
If there is no print screen key on your Dell laptop or keyboard, you can try pressing Fn + Windows key + Space Bar to take a screenshot. Also, you can use the Sniping Tool to take a screenshot.
After reading this post, you can get 3 free ways to capture full screen or selected region on your Dell computer with Windows 10, Windows 8 or Windows 7 system. For more questions about how to screenshot on Dell, you can leave us a message in the comment part.