When you have some important voice memos on your iPhone, how to copy voice memos from your iPhone to a computer as a backup? Moreover, you can also delete the transferred files from the iPhone to release more space. The article shares 3 frequently used methods to transfer voice memos from iPhone to computer. Just go through all the methods and choose a suitable method according to your requirements.

If there are a large amount of files, such as voice memos, videos, TV shows, photos and more other files, AnyMP4 iPhone Transfer Pro is the ultimate method you should take into consideration. It not only transfers voice memos from iPhone to computer, but also sync data files between iOS devices. It is one of the best alternatives to iTunes.
Secure Download
Secure Download
Step 1. Connect your iPhone to a computer
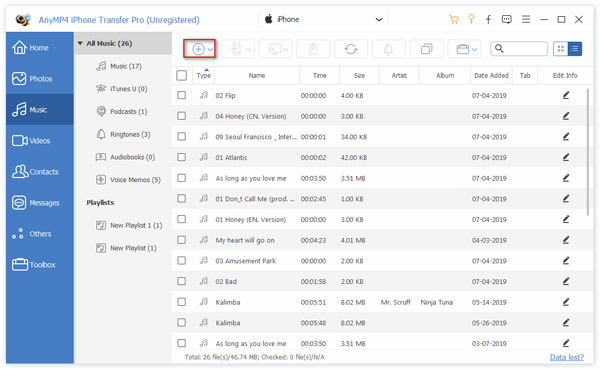
When you download and install the software, you can launch the program on your computer. Connect the iPhone to your computer with the original USB cable. The program is able to detect the iPhone automatically.
Step 2. Select the desired voice memos from iPhone
Go to the "Music" tab and find the "Voice Memos" from the left menu, you can preview the voice memos you want to transfer and check the options in front of the voice memos.

Step 3. Copy voice memos from iPhone to computer
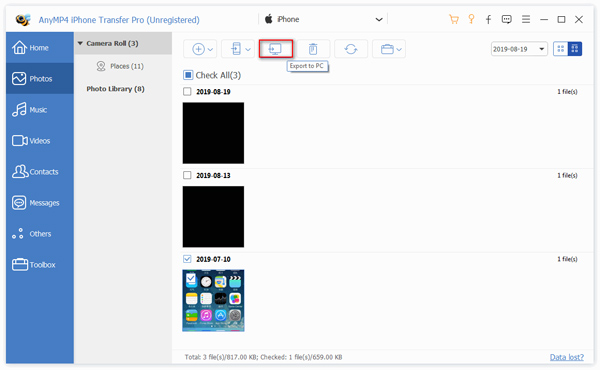
Click the "Export to PC" button to copy the voice memos from your iPhone to the destination folder on your computer. After that, you can preview the voice memos in the computer.

iTunes is the default method to save iPhone voice memos to your computer. It will transfer all the voice memos instead of the desired files. Once you have connected your iPhone to iTunes, it will automatically sync the files. Of course, you can also manually download the voice memos of the iPhone.
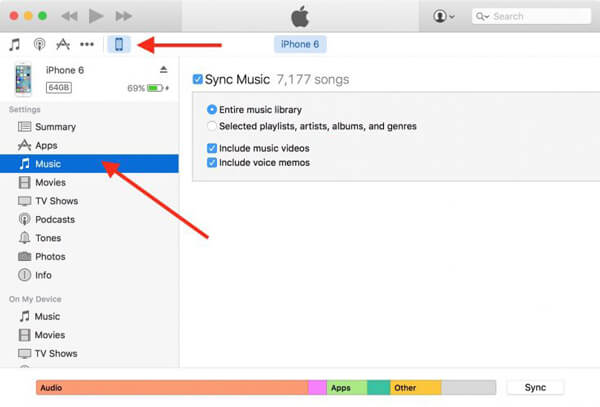
Step 1: Connect your iPhone to a computer via the original USB cable. iTunes will launch automatically to detect all the files. Locate your iPhone on the left side of the iTunes.
Step 2: Click the "Music" option and select the "Sync Music" option. Select the "Include voice memos" option to extract your voice memos and transfer voice memos from your iPhone to the computer.
Step 3: After that, you can locate the transferred voice memos from your computer with the following path. The files are usually in M4A or MP4 format that is playable for most of the media players.
Window- Go to File Explorer then go to C:\Users\NAME\Music\iTunes\iTunes Media\Voice Memos
Mac- Go to Finder then go to /Users/NAME/Music/iTunes/iTunes Media/Voice Memos

When you need to save some voice memos from iPhone to computer, Email is the easiest method. It only sends one file at a time, moreover, you also have to download voice memos to your computer. Just learn more about the process as below now.
Step 1. Launch the Voice Memos and left swipe the voice memos you want to transfer. Tap on the "More" button and select the "Share" option to transfer the file on your iPhone.
Step 2. Choose the "Email" option to get the voice memos off iPhone to your computer. If you have not added an Email account, you should set up a related account beforehand.
Step 3. You can find the voice memo is attached to the email. Compose the email with the email address, recipient, subjects and other information before sending the files.
After that, you can login the email account from any computer and download the voice memos from iPhone to your computer with ease.

The article shares 3 frequently used methods to transfer voice memos from your iPhone to a computer. When you need to transfer a large amount of voice memos, or even other files, iPhone Transfer Pro is always the first choice. If you just need to back up the voice memos, iTunes is the default method without selecting the files. Of course, you can also transfer some files via email, which you can download them to computer anytime you want.