iTunes plays an important role in all Apple products. In spite of other backup and restore features, this article talks about syncing playlists from and to iTunes library mainly. Yes, you can transfer playlists from iTunes to iPhone or reversely to enjoy music on other digital devices. Want to know how to move playlists between iTunes and iPhone? Just read and follow.

To play the playlist smoothly, you need to make sure that all songs contained in this playlist should be saved in your computer. If you are not sure whether you have downloaded all the contained music or not, you can use AnyMP4 iPhone Transfer Pro to get the one-stop solution. By the way, you can also move a playlist with the songs that are not downloaded from iTunes. Well, the program can help you transfer playlists from iPhone to iTunes with tunes quickly.
Actually, you can move all kinds of data from iPhone, iPad and iPod to iTunes, such as playlists, music, music videos, iTunes U, audio books, podcasts, videos, photos, etc. In a word, you can keep your iPhone synchronized with iTunes flexibly.
Secure Download
Secure Download
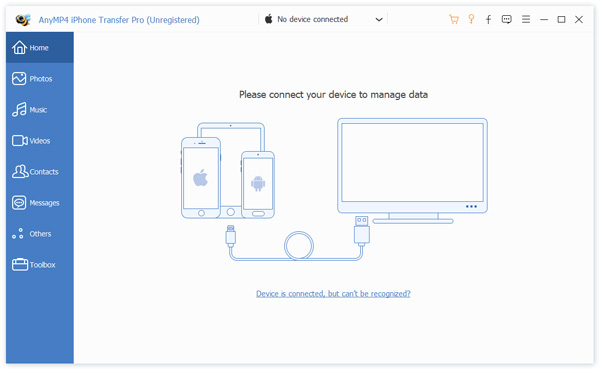
Step 1. Launch AnyMP4 iPhone Transfer Pro. Use a USB cable to connect iPhone to your computer. Once you trust this computer, you can see the basic information of your recognized iPhone on the main interface.

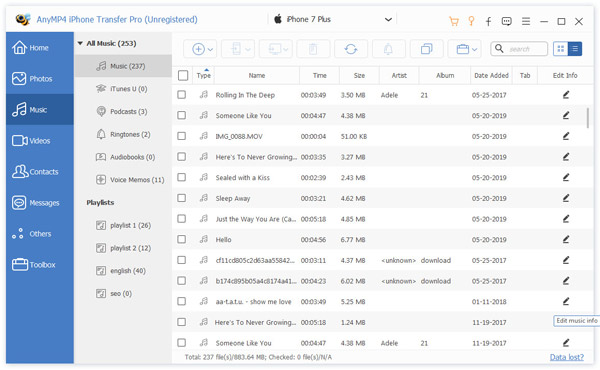
Step 2. Click “Music” in the left pane. You can see all the iPhone music files. Choose which playlist you want to sync to iTunes under “Playlists”. You can click the “Edit” option to manage and delete the contained songs before importing to iTunes.

Step 3. After selecting the playlist, click the computer icon on the top toolbar. Select “Export to iTunes” to move a playlist from iPhone to iTunes.

To quickly move iTunes playlists to your iPhone, you can turn to AnyMP4 iPhone Transfer Pro for help too. There is a one-click iTunes to iPhone/iPad transferring feature. You can extract and transfer playlists and other files from iTunes library to iPhone in one stop.
Step 1: Run AnyMP4 iPhone Transfer Pro. Connect iPhone to your computer.

Step 2: After iPhone is detected, click “iTunes Library” near the bottom. Then choose the “iTunes to Device” option.

Step 3: Click “Playlist” to access iTunes playlists. Later, click “One-Click to Device” to transfer playlist from iTunes to iPhone in one click safely.
If you don’t create any playlist on your iPhone before, you can sync playlists to iPhone with iTunes directly too. Otherwise, your previously-created playlists will be overwritten.
To start with, you had better enable “Manually manage music and videos” in the “Options” section in the “Summary” page. Once you disable this feature, all the existing iPhone contents will be replaced by the content from the iTunes library.
Now, let’s start adding iTunes playlists to iPhone with iTunes 12. There are other 2 methods to transfer playlists from iTunes to iPhone. Just read and check.
Step 1. Update iTunes to the latest version. Then connect iPhone to your computer with a USB cable.
Step 2. Choose your iPhone icon on the top left corner of iTunes.
Step 3. Click “Music” in the left pane. Enable the “Sync Music” option.
Step 4. Under the “Playlists” section, select the iTunes playlist you want to move to iPhone.
Step 5. Click “Sync” to sync a playlist from iTunes to iPhone.

Step 1. Plug iPhone into the computer. Then run iTunes. Your iPhone will be recognized by iTunes immediately.
Step 2. Click the “Music” icon on the top left corner of the toolbar.
Step 3. Switch to the “Playlists” section. Browse and select the playlist you want to move to iPhone.
Step 4. Drag and drop the iTunes playlist to your device icon. You can find the name of your iPhone under “Devices”. Later, you can export an iTunes playlist quickly.
Step 5. If the playlist already exists in your iPhone, you can click “Replace” to update this playlist in the popping-up dialog.

Conclusion
If you want to sync iPhone playlists and other files to iTunes, definitely you should not miss AnyMP4 iPhone Transfer Pro. No data loss or overwritten will occur. The program can convert video and audio files to the compatible formats automatically while transferring. Moreover, you can transfer data between iOS devices without iTunes safely and easily. No matter you want to transfer everything to your new iPhone or the selected files, you can get the satisfying result here. That’s all for how to transfer playlist between iTunes and iPhone. If you still have other questions, you can feel free to contact us.