Image printing is important for social events and gatherings to feel more inviting and welcoming to its attendees. Additionally, these banners also provide clarity for the invited people to easily understand what is the event that is being celebrated. With that in mind, the dots per inch or DPI of an image is important for printed banners since it has an important role; moreover, low-quality printed materials may provide the opposite of the message that it was meant to convey. In this article, we will learn multiple ways to learn how to change DPI of an image to make a banner that will be high quality and appealing for any form of social event. Please read the article below to learn more about this topic.

Before proceeding to our main topic, let us first define what exactly is an image's dots per inch (DPI) and what is its difference when compared to pixels. To start, DPI is a type of printing setting that defines the amount of dots that will be applied in a single inch of the material that will be printed into. On the other hand, pixels are digital dots that also define the quality of a digital photo. In a way, the two measurements are similar except for the platform where they will be used. DPI is for physical printing and pixels are for digital images.
If you change the DPI of an image file, its printed quality will be affected depending on your adjustment settings. Because of that, images that will be used for printed banners, flyers, tarpaulins, clothes, and dining equipment must have high DPI to ensure that the image quality will be preserved. 300DPI is the safe threshold that most designers and photographers use as a standard.
DPI is different from PPI, and get more information about how to change image pixels here.
We will start this section of the article by featuring the most famous photo editor software for both Windows and macOS platforms with Adobe Photoshop, the pioneer editing tool built for images available in Adobe Creative Suite.
Since this tool is primarily made for photo editing and is considered the standard software of designers alike, changing image DPI in this tool was made simple by its developers. As an additional convenience feature, the DPI can also be adjusted together with the size of the photo that is being edited.
To learn how to change image DPI using Photoshop, a quick three-step guide will be featured below:
1. Open Adobe Photoshop and add the file that you want to adjust the image DPI.
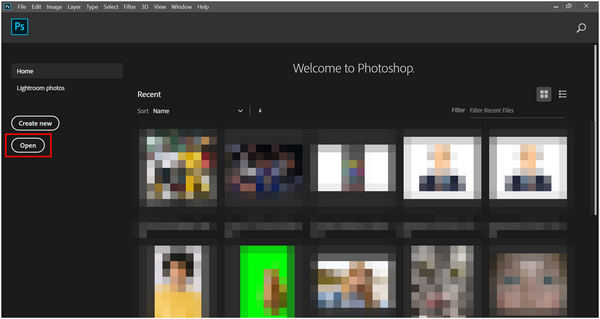
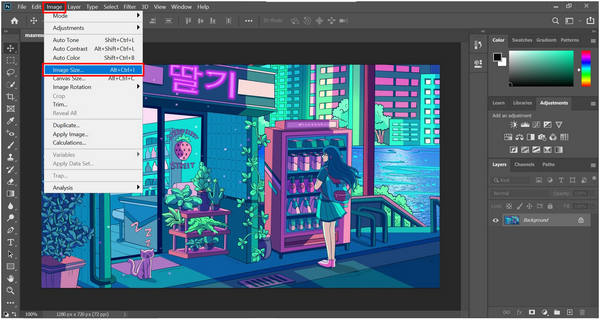
2. After adding the file, select the Image tab and then click on Image Size.
3. In the Image Size editor, select Resolution and change its value depending on where the image will be used. Click OK to confirm your setting.
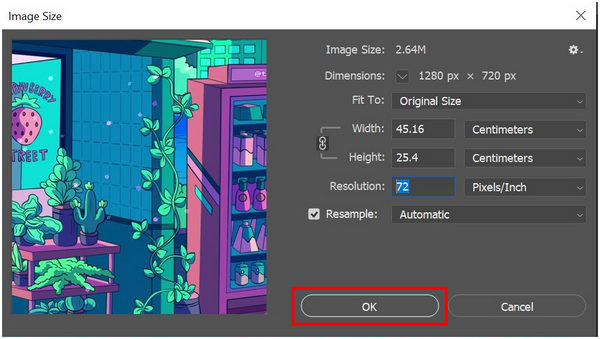
By using the image size editor of Photoshop, you can now change the DPI of the image that you are editing and adjust its size and resolution in one go. Moreover, changing the DPI of image files on this editing tool is relatively easy when compared to other features also available in Photoshop.
The next option for DPI changing that we will present is Clideo’s DPI Converter tool, an online tool that can change DPI right after uploading the file that needs to be edited. Since it is an online service, Clideo does not need to be installed which can save a lot of time for express DPI changing. However, its online nature also limits its convenience since the tool can only be accessed with a stable connection.
To learn how to use the Clideo DPI converter, please read our quick guide below:
1. Search for Clideo DPI Converter on your browser.
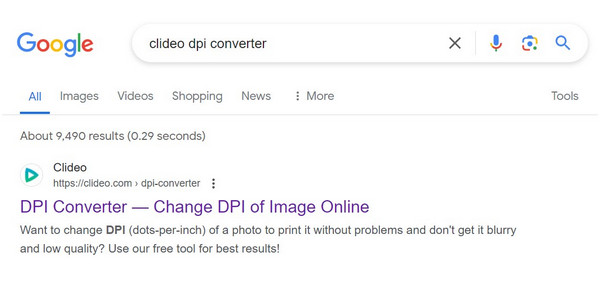
2. In the site’s main interface, click Choose File to add the image that you want to convert.

3. Set the DPI that you want to apply. Then, click on Continue to start the conversion process.

4. In the next window, click the Download button to save the edited image back on your computer.
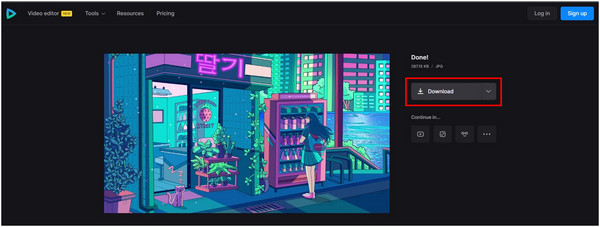
Clideo is one of the most trusted multimedia editing tools across the online market. Because of that, their DPI converter is also well-received and trusted by their loyal consumers. However, their process is slightly slower than other services.
We will stick with online tools for the third option in this section with Pi7 Image Tool, a more straightforward option than Clideo since this site is exclusively built for processing image files. This is also the reason why it can change image DPI faster and more efficiently unlike Clideo where the conversion process takes almost a minute.
Please follow our guide below to learn how to use the Pi7 Image Tool as an image DPI converter:
1. Search for Pi7 Image Tool.
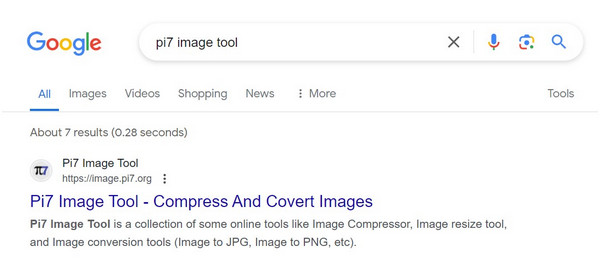
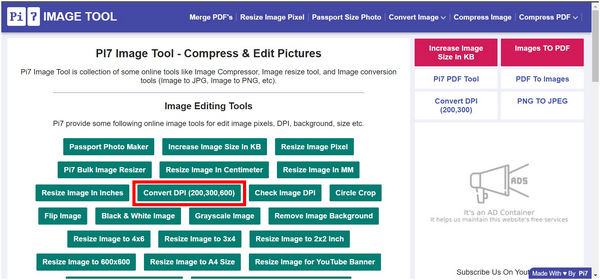
2. On Pi7’s site, select the Convert DPI option.
3. Next, click on Select Images or drag the photo that you want to change the DPI into the drop box.
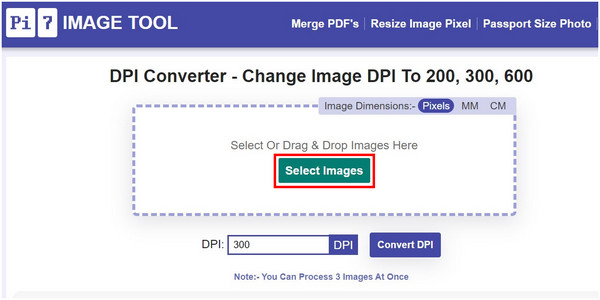
4. You can change the DPI value on the designated tab if you want higher quality than the standard 300. Otherwise, click Convert DPI to start the process.
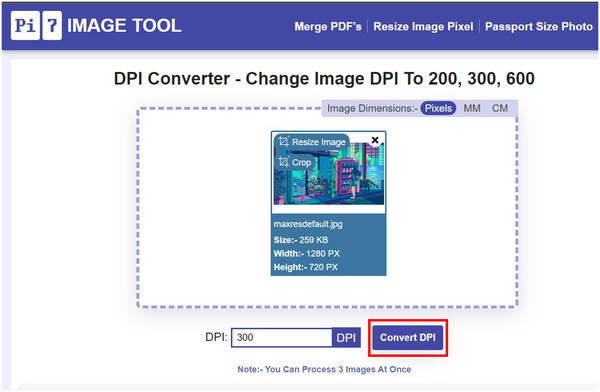
5. Simply click on Download to save the image with adjusted DPI back into your computer.
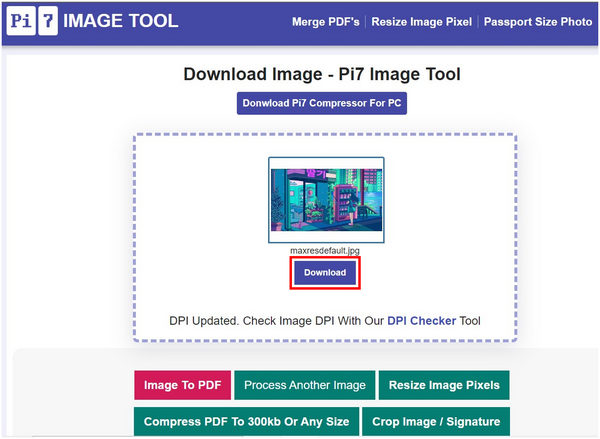
Pi7 might have more steps when compared to Clideo, however, it is easier to use since it can process images much more efficiently. This heavily outweighs the additional steps required to use this tool.
To learn if the DPI of your image needs to be changed, the first step is to know how to tell the DPI of an image first since it will verify the need for a DPI change. Fortunately, this process does not require any third-party tools since the DPI of an image can be seen on the properties of the file.
To learn how to check the DPI value of your image, please refer to our guide below:
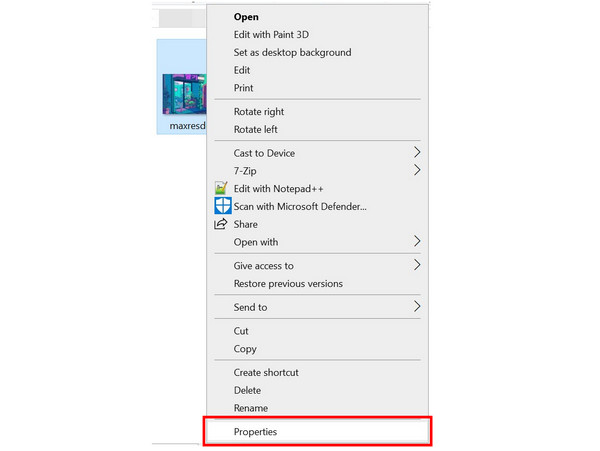
1. Locate the image that you want to check and right-click on it. Select Properties on the list.
2. In the properties window, select Details.
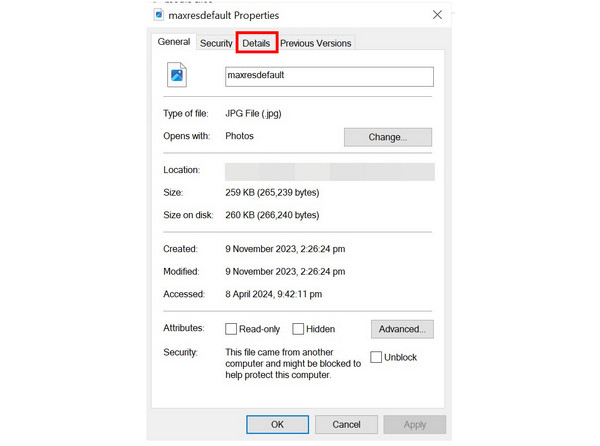
3. Under Details, scroll down and look for the DPI value labeled horizontal and vertical resolution.
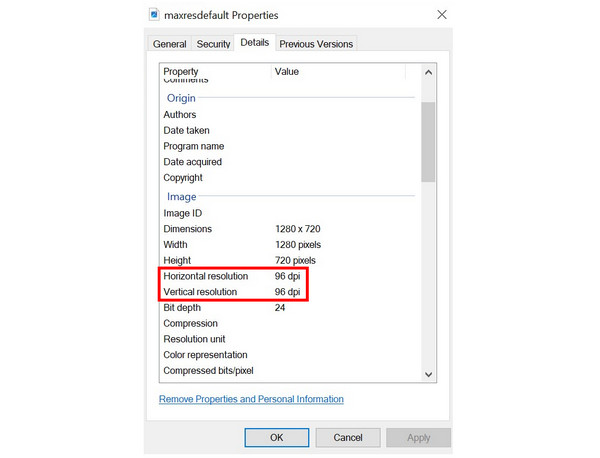
Now that you know how to determine DPI of an image, building a habit of checking it first before printing an image is a good quality control routine. By ensuring that the DPI of your image at least follows the 300 DPI standard, you can ensure that the visual quality of printed images will be high.
Now that we have discussed the concept of image DPIs, we can tell that this element is a little bit complicated for something whose main job is to improve image quality. Because of that, searching for an alternative to increase image quality without changing DPI is a solid option for users who do not want to overcomplicate things. With that in mind, AnyMP4 Image Upscaler Online is made for these users.
As its name suggests, this online tool is made to improve the quality of images by upscaling them directly on the resolution. This means that the resolution of the image itself will be enlarged to improve the texture, details, and overall quality of the photo. As a result of higher resolution, the printed quality of images upscaled using this tool will be top-notch and can even compete with files produced with high DPI by traditional photo editors.
In addition to high-quality image upscaling, AnyMP4 Image Upscaler Online is also ideal for these uses:
To learn how to use AnyMP4 Image Upscaler Online for improving images without adjusting DPI, a complete guide is provided below:
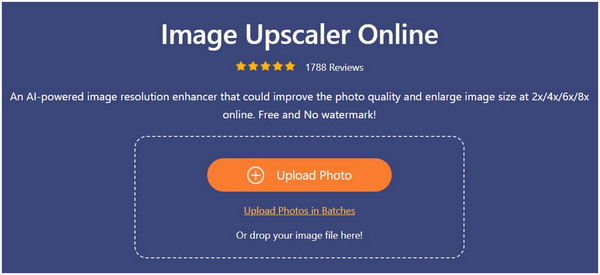
1. On AnyMP4 Image Upscaler Online’s website, click the Upload Button or drag and drop the image that you want to edit in the uploading box.
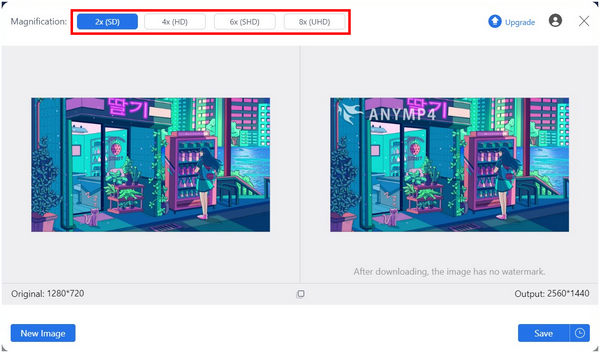
2. With the image now added, select the magnification mode that you want to use. You can choose among 2× (SD), 4× (HD), 6× (SHD), and 8× (UHD).
3. After choosing the upscaling value, simply click on Save to download the now-enhanced image on your computer.
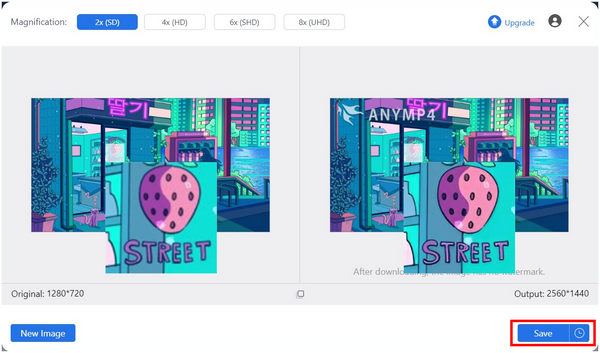
By following these three simple steps, you can now bypass the complicated DPI adjustments if you want to ensure the quality of printed images. This option is also completely free making it a practical choice for every designer alike. Because of that, AnyMP4 Image Upscaler Online can be described as a better option instead of being a secondary alternative.
Is 300 DPI overkill?
No, it is not. 300 DPI is considered standard high-quality. This makes it a good option for high-quality printing.
Is 72 DPI better than 300 DPI?
No, it is not. 72 DPI is worse than 300 DPI. 300 DPI is the minimum setting for high-quality printing.
Does DPI affect digital image quality?
Yes, it does. Higher DPI also affects the quality of your image. This is both true for digital and printed ones.
Is it hard to convert an image to 300 DPI?
Yes, it is. You need to know the right tool to convert images to 300 DPI. An easier alternative is upscaling images using AnyMP4 Image Upscaler Online.
Should I check the DPI of my images before printing them?
Yes, you should. DPI heavily affects the quality of printed images. Make sure that it is always high-quality.
Learning how to change the DPI of an image takes a lot of work if you only want to improve the quality of your images. Fortunately, there are alternatives available online that are much simpler and easier to use. The best among them is AnyMP4 Image Upscaler Online. With that in mind, it is a smart choice to consider this tool as an option if you want to avoid the intricacies of DPI adjustments.
Please share this article online to help other people learn how to change the DPI of an image.